
If you’re like me, the holidays can be a big sparkly, glittery blur. We made (and ate) our fair share of tamales and gained a pound or two, but before you take down that last string of Christmas lights remember that in many parts of the world the holidays are not over just yet. In Mexico, the big day for children is actually on January 6th — the Epiphany.
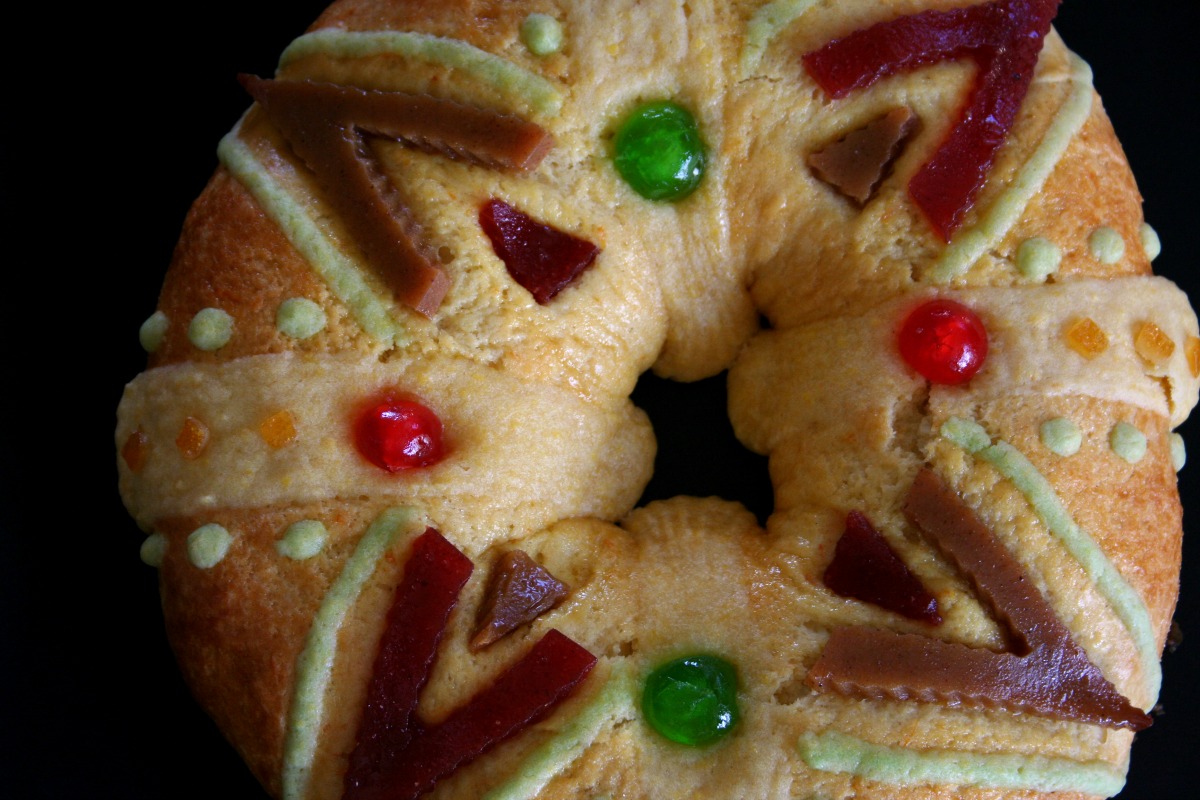
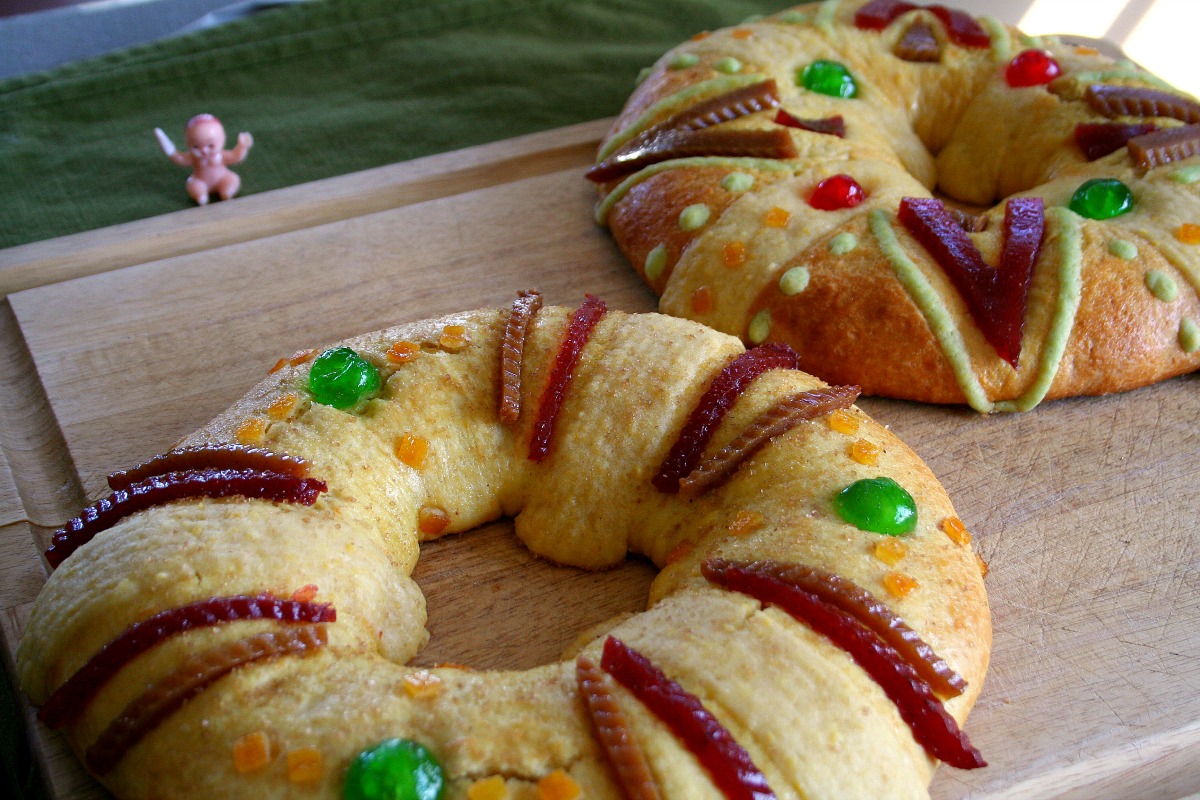
A traditional Rosca de Reyes, or Three Kings Bread, is baked in order to share with family and friends on this special day. This lightly sweetened yeast bread is perfect for dipping and dunking into hot champurrado or Mexican chocolate. You may be able to still find your Rosca de Reyes at your local panaderia or Latino grocery store, but be mindful because they run out fast. Do not fret, with this recipe below now you can make your own!

Don’t be daunted by the amount of ingredients or the steps, because this recipe is worth it. The recipe yields a Rosca de Reyes about the size of a cookie sheet, two medium sized roscas or 3 small breads. I recommend making a big one and inviting all your friends and family over for a slice. Also, don’t forget to put in the baby Jesus!
Here is a video we developed for Herdez Brands to celebrate Three King’s Day. That big gorgeous Rosca de Reyes was made with the recipe that follows. For more authentic holiday traditions and recipes, visit HerdezTraditions.com
Rosca de Reyes
Ingredients:
½ cup warm water
1 envelope dry active yeast
4 cups all-purpose flour, sifted plus more for dusting
1 cup white granulated sugar
1 ½ sticks unsalted butter (6 ounces)
3 large eggs
3 large egg yolks
2 tablespoons whole milk
¼ teaspoon kosher salt
¼ teaspoon ground cinnamon
1 teaspoon vanilla extract
1 ½ teaspoon orange extract
Zest of 2 medium oranges
1 large egg, beaten
1 tablespoon whole milk
Sugar for sprinkling
Candied/dried fruit
Ingredients for paste:
1 large egg yolk
¾ cup all-purpose flour
6 tablespoons margarine
½ cup powdered sugar
Procedure:
1. In a medium bowl, combine the water and yeast. Allow it to bloom, about 5-10 minutes.
2. After the yeast blooms, whisk in ½ cup of flour. Cover and allow to sit for about 25 minutes. (Optional: you can also add in a pinch of sugar to help feed and grow the yeast.)
3. In a stand mixer, cream the sugar and butter with the paddle attachment.
4. Beat in the eggs/yolks one at a time with the speed on low until fully incorporated, about 1 minute each yolk.
5. Add the milk, salt, cinnamon, extracts and zest. Beat in for about 1 minute.
6. Use the dough hook attachment, slowly mix in the remaining 3 1/2 cups sifted flour just until the dough starts to come together.(You may not use all the flour or you might need to add a little more. Remember: moisture in the air is not your friend here.)
7. Add in the yeast and mix on medium for about 5 minutes, scraping down the sides and bottom as needed. Place on a clean lightly-floured surface to knead until smooth.
8. Place the dough in a greased bowl. Cover with plastic wrap and allow to rise in a warm place. The dough should about double, about 60-90 minutes.
9. Meanwhile, make the paste: using a hand mixer, combine large egg yolk, flour, margarine and sugar until creamy. Place in a piping bag with a wide tip like a large basket weave tip/cake icing tip. The sugar paste will be piped in bands around the cake, so the size and shape is ultimately up to you. (You can also just form shapes (thin/thick bands) with your hands or roll out shapes with a rolling pin or even use cookie cutters. If the paste gets too soft from the heat of your hands, simply refrigerate for a few minutes.)
10. Punch down the dough in the bowl. Place on a lightly floured surface and gently form into a ball. (You can cut the dough in half or thirds if you want smaller breads. While I prefer them, sometime making one large bread is easier for larger groups.)
11. Using your fingers, poke a hole in the center of the dough ball. Slowly make the hole bigger, gently stretching and pulling so that the ring is uniform in size.
12. Place parchment paper on a baking sheet tray(s) and spray with a neutral non-stick cooking spray. Place the dough ring on the paper, cover with a clean dish towel and allow it to rest in a warm spot for another 40-45 minutes.
13. Preheat your oven to 375°F.
14. Prepare the egg wash by whisking together the large egg and milk. Right before you are ready to decorate the Rosca de Reyes, brush it with the egg wash.
15. Use the reserved sugar paste you made by piping bands across the bread. Decorate the bread with the candied fruit any way you would like. (Remember that the decorations are a matter of taste, so use as much or as little as you like.)
16. Bake for 10 minutes are 375°F, rotate the bread(s) then reduce the temperature to 350°F and allow to bake for another 10-15 minutes, until it has browned to your liking.
17. Allow to cool on the baking sheet for a few minutes before removing to a cooing rack. Allow to cool completely before placing the plastic baby inside.
Hello thank you for taking your time to write this recipe. I find a bit confusing on the part where I need 4 cups of flour. But also I need a half a cup to add to the east Mixture. So is this half a cop already included in the four cops or do I need 4 1/2??
I’m wondering if that is the reason why my bill was not rising quite the way I was expecting. I ended up using 3 1/2 cups of flour in total. But it all in the mixer. But then my dough was way too sticky so I added a bunch of more flour to make it right. What did I do wrong???
Hi Eveline, thank you for taking the time to try one of our recipes. The recipe is 4 total cups. Take 1/2 cup flour from the 4 total cups to help feed the yeast. I do this to help facilitate the blooming of the yeast. You can also add a pinch of sugar OR nothing at all. I hope that makes sense. Regarding your yeast – optimal temperature is between 110-114 degrees Fahrenheit, but just make sure its in a warm place for it to bloom. In Los Angeles we are in the middle of an El Nino tantrum, making my house cold but my kitchen too moist. When this happens I also have to add additional flour to get my dough right. I hope this recipe did not discourage you. On a regular SoCal day this recipe works perfectly. On a wet, rainy, too-moist-in-my-kitchen day, I work the dough until it feels right, less sticky but just slightly tacky to the touch. (If the dough doesn’t rise perfectly, you’ll still have a pretty darn tasty bread. And if you’re adventurous, try switching out the extracts, spices and nuts. Imagine the flavors of an almond bread with candied lemons and dried blueberries. Or just anise and orange. Mmmm, hmm!) Hope this helps. Happy baking!