As part of reviving the holiday traditions that have defined our families and communities for years, LatinoFoodie set out to make tamales this season with a sweet twist. Earlier in the month, we gathered with our primas and primos for a family tamale making party. There’s nothing better than several generations coming together sharing stories of times past and laughing at our crazy lives today. Anyone who has made massive amounts of tamales knows that there is a process. I called it Tamale Boot camp. Everyone had their assignments and worked diligently to keep the hojas moving. In total, I think we made close to 50 dozen savory red and green chili pork and beef tamales.
But, people are finicky when it comes to sweet tamales. Some people like them, others don’t. These chocolate tamales piqued our interest because of the use of Mexican chocolate and the idea of kicking it up with some heat. Your young children, or Tweens, will love to get their hands nice and gooey with the chocolate masa. It’s a fun way to pull your kids away from the video games or television and share some holiday cheer.
We served the chocolate tamales as a dessert, accompanied with caramel and chocolate dipping sauces. They’re also delicious paired with a scoop of vanilla ice cream. The following recipe was adapted from this well-known recipe by Chef Rick Bayless.
Chocolate Tamales
Yield 50
1-8 oz. package dried corn husks
10 oz Mexican chocolate, pulverized
10 oz. unsalted butter, cubed & softened
1/3 C granulated white sugar
½ tsp Cayenne pepper (More if you want a spicier kick.)
1 tsp salt
1 ½ tsp baking powder
2 lbs freshly prepared corn masa
1 Cup reduced fat milk
Optional
1 pkg. Semi-sweet chocolate chips
Chocolate or Caramel sauce
Powdered Sugar
Now a note on the size of your tamales:
We went with about a heaping tablespoon of chocolate masa per tamal. This allowed us to make 50 small dessert sized tamales. The larger your tamale the longer you’ll be steaming.
Procedure:
Aprons! You’ll never forget the experience of making tamales with your family, especially if this is your children’s first time. It can get messy so steel yourself now: your little ones will get masa on their clothing…possibly in their hair…and all over your counter/floor. Instead of spazing out, incorporate the aprons/masa/mess into your tamale memories.
One to two hours before you’re ready to make tamales, you’ll need to prepare the hojas (corn husks) by submerging them in really hot water. I did this by placing my hojas in a big tub. I then pour the hot water over the husks. You can keep them submerged by weighing them down, i.e. place a heavy pan on top. The hot water will help make the husks more flexible, which is essential for easy tamale making.
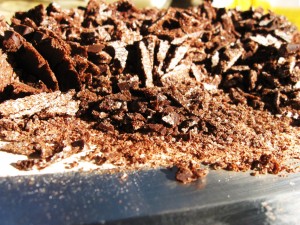
Preparing the batter: You’re masa is halfway there if you purchased it already prepared. Using the base of your knife, chop your chocolate into smaller pieces that your food processor can handle. Once your chocolate is chopped, pulverize it in a food processor.
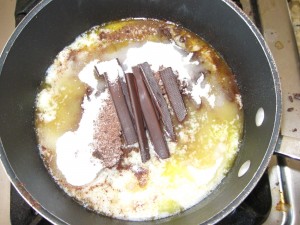
Place the chocolate in a medium sauce pot over medium-low heat, then add the softened butter, sugar, baking powder, cayenne pepper, and salt. We also added a few chocolate batons to the mix, but you can add some semi sweet chocolate chips. Using a whisk/ spatula, mix the ingredients together. (Please note that you are not cooking it. You merely want to melt the chocolate so that your tamales are not grainy. This process should take a few minutes.) Once combined, take it off the heat.
Once it’s cool enough to handle, you can start slowly adding the chocolate to your corn masa. Grab a big bowl and mix as you go with a silicone spatula so the chocolate and corn are well incorporated.
If your masa looks or feels too dry, simply add in a little of your reserved milk until you reach the right consistency. It will be sticky, but it should hold its shape somewhat.
You’ll end up with a big batch of chocolate masa. Since your corn husks are still softening, place your masa in the fridge, covered, for an hour, or until your tweens are motivated enough to roll up their sleeves and start filling and folding.
Once your corn husks are pliable and your masa has been chilled you can start making tamales. Select the husks you’re going to use. (You’ll be selecting husks based on how big or small you want your tamales. I found that larger husks could be ripped into two pieces to make the smaller tamales. Don’t throw any away because you might be able to use some of the scraps to tie up the ends.) Working in batches of a dozen, pat them dry with a clean kitchen towel.
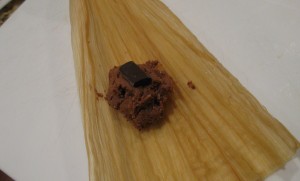
Have your children help you scoop the chocolate masa and place it in the middle of a corn husks. At this step we added little bits of semi-sweet chocolate by gently pressing it into the masa. (The tamale will absorb some of the chocolate so don’t expect a molten center. You can try it with frozen berries or candied peels. Just remember that you’ll be steaming your tamales, so if you decide to place something inside the masa, make sure it can stand up to the steaming or be absorbed into the masa without being a mushy mess.) Gently roll the husk closed and twist the ends. Using a long, thin strip of corn husk tie both ends of the tamale. This is the bulk of your work, so settle in on chairs with your kids and enjoy. After each dozen place them in the fridge. This will help them keep their shape before steaming. At this stage you can also freeze some for later.
Steaming your tamales will take about 45 minutes, plus an additional 20 minutes to cool. The tamales will firm up again once they begin to cool. Place in a cute serving dish and serve with chocolate or caramel dipping sauces. As stated above, you can also serve it with a scoop of ice cream, but you can also partially open the husk to expose the tamale and dust it with powdered sugar.
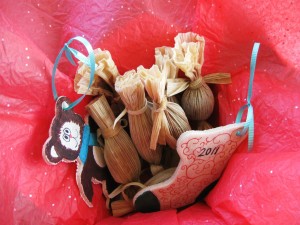
With a little tissue paper and some ribbon, these chocolaty packages make great gifts for the holidays.


